Making sourdough bread is something that has both fascinated and intimidated me for a long time. Today I am so glad that I have decided to learn how to make it. It is not only the best bread I have ever had but also it gives me such sense of accomplishment and pride when I take a beautiful loaf out of the oven. You might think it silly but I feel like I have a skill that was vital for my ancestors and I am proud I can do this.

Is sourdough bread really that difficult?
My simple answer to that question is not really. When you first see someone make it or you hear the process described it might feel like something super complicated but once you do it a couple of times you will find out that the actual amount of work is about 30 mins and a great result is not that hard to achieve. In my experience even when the bread turned out to be mediocre (meaning it was pretty flat and not as fluffy inside) I had people comment that the taste is amazing. So even if you won’t like the look of your bread I am quite certain that you will enjoy eating it. That being said there are a few factors that will have an impact on the process and you should be aware of them.
Best bread flour
From my experience the easiest flour to work with when it comes to bread is your good old all purpose flour. It has the most consistent results when it comes to the bread rising power. As for other flours I have tried rye flour and wholegrain all purpose flour and with both the bread is just not as nice and puffed up. For me the downside of using only all purpose flour is that the taste is pretty bland. So my solution is to use a main portion of all purpose flour (300 g) and the remaining smaller portion (60 g) I will substitute for wholegrain all purpose flour. My advice for any beginner is to start with all purpose flour and once you are more familiar with the whole process you can start experimenting with other flours.
Folding and shaping the bread
If there is anything that requires some skill in this process it’s the folding and shaping of the bread. But once again you only need a few tries, maybe watch a few videos (mine is linked below the recipe) and you will get the hang of it. I am doing the coil fold but you can also do something called stretch and folds so be sure to check out both methods to see what will fit you best.
Essentially with both steps you are trying to increase the tension in the bread dough which will help it rise. With the folds (in either method) you are stretching the dough and then folding it back onto itself. When you are shaping the bread you are stretching it against your counter to create that tension.
Temperature and timing
The temperature in your kitchen matters and the equation is simple – the warmer it is the faster the fermentation process. So if your kitchen is really warm you may need only 20 mins between each fold of the bread. On the contrary if it’s really cold you might need to increase the timing to 45 mins. But it’s not like you have to measure the temperature precisely and then change your timing accordingly. Stick to the general idea. If it’s winter and you are wearing a sweatshirt then do the 45 mins, if it’s the middle of summer and you’ve wearing a short sleeve dress you should shorten the time between the folds. Again once you do this a couple of times you will be able to tell just by looking at your dough how much more time it needs. When there are lots of bubbles forming on top of the dough that means it’s ready to go into the proofing basket.
I know I have just given you some timings but making bread is not an exact science. I like using an alarm on my phone for all of it but I know that if I add 10 mins here or 20 mins there it won’t really change the result much. The only problem is when I tick off my alarm clock and then completely forget about my bread 😀 You don’t want it fermenting for 3 hours instead of 20 mins.
Sourdough starter
You should be using active starter for this bread. That means a starter that has been fed recently and has risen to its maximum potential with plenty of bubbles inside. This is because you need the full strength of the starter to make the bread rise properly. This doesn’t mean that there is only a 5 min window or so when the starter is at its peak and the rest of the time it’s unusable. I find that the window is more like 2 hours so you don’t need to worry about it too much.
Equipment needed
The good news is you don’t need any special equipment to make bread. There are a few things that will make it easier for you and will make a visually nicer looking bread. But if you are just beginning and you don’t want to invest into buying anything new then you don’t have to. So let’s talk about the things that will make a difference.
Proofing basket
You will need to put your bread into something to have it proof but it doesn’t necessarily need to be a proofing basket. There are plenty of guides online that show you how to make a diy version of a basket (usually out of a tea towel). I would recommend getting one to make things easier for you since it is usually quite cheap and it saves you the additional hassle with having to create your own basket. One tip I have for you here is to use rice flour for dusting the cloth in the basket. Rice flour is really good at sucking out moisture and so it will help with any sticking issues you might have (especially in the beginning when the cloth is brand new and clean).
Glass bowl
You can of course mix the dough in any bowl you want. The advantage of using a glass one is for its transparency. You can clearly see once the bubbles start forming on the sides of the dough which is a helpful indicator of the fermentation process happening.
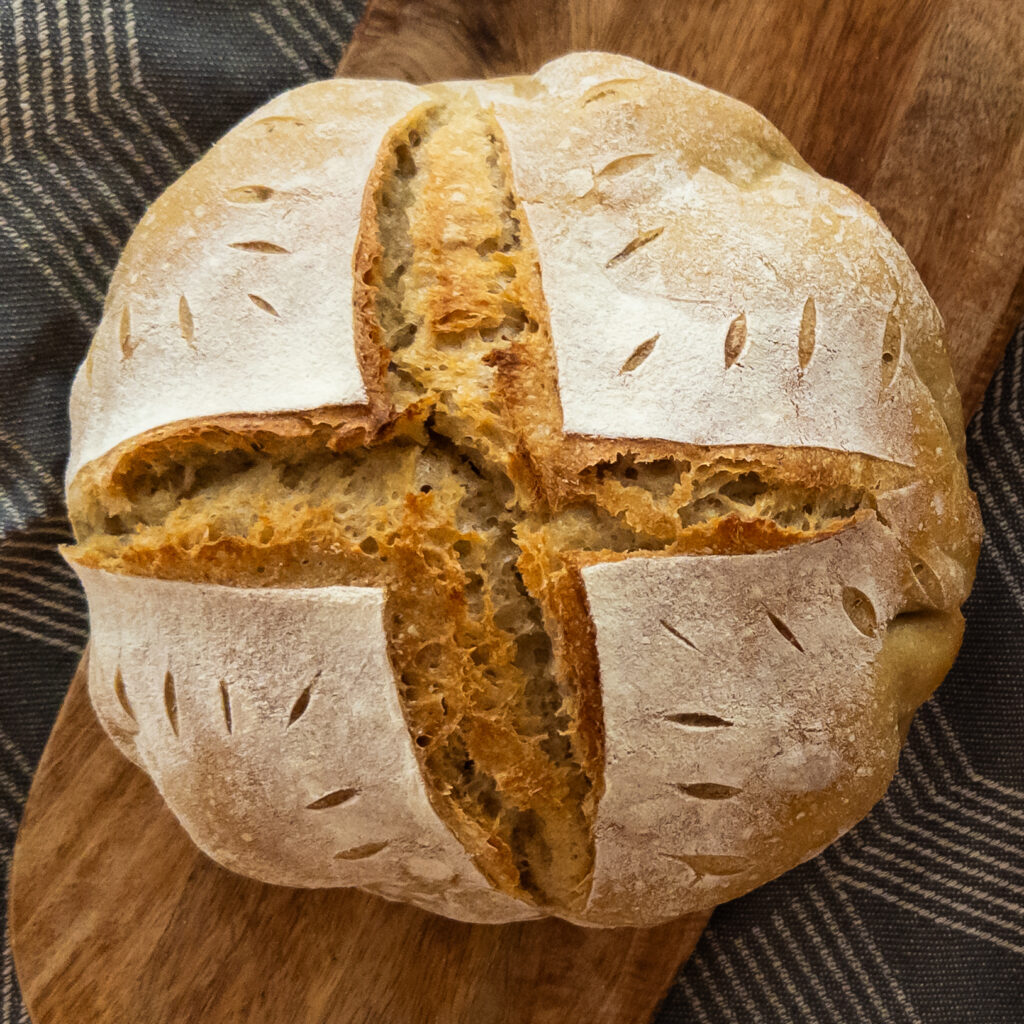
Lame
When it comes to scoring the bread you can use any sharp knife you have at home and it will do the job. But just like with the proofing basket getting a lame (which is essentially a razor inserted in some sort of a holder) is going to make your life easier. You will also have more freedom in the scoring patterns to explore as the razor is super thin and sharp and therefore better for the job.
Bathing cap
This is not a joke. I really do use a bathing cap when making bread it’s just not for my hair. I use it to cover up the bowl with the dough when it’s rising on the countertop. It’s perfectly fine to use a tea towel for this, I just prefer the bathing cap as it’s more “clean”. It fits the bowl perfectly and there are no strips of cloth hanging down dragging on my counter (which is already small enough, I don’t need the extra fabric to take up even more space on it).
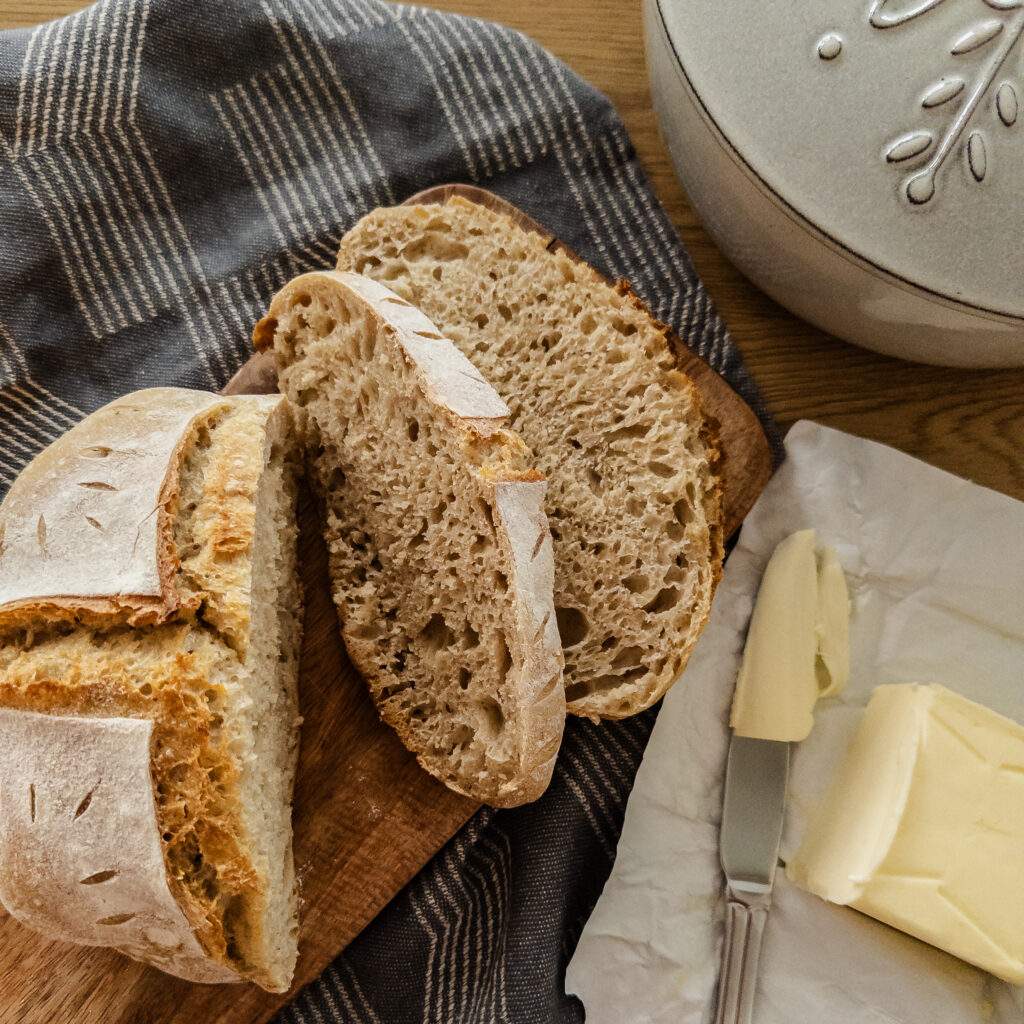
Dutch oven
When I first started making bread I used a simple baking tray and that worked okay. It was a bit of a hassle as I also had to use another tray below it with water to get a nicer crust on the bread. After a few months of making bread I knew that I wasn’t going to stop any time soon. And Christmas was just around the corner 🙂
When I made my first bread in the dutch oven I couldn’t believe the difference it made. The bread puffed up much more than before and the crust finally looked like the pictures you see on Pinterest – all crunchy and rough. Even though I scored the bread the same way before the crust was always very smooth, it didn’t crack open like in the dutch oven. So if you want to take your bread making to the next level and you have the money to spend then a dutch oven is something I can definitely recommend.
Baking timeline
As mentioned before there is not one specific timeline that you have to strictly stick to but I hope it will help if I share with you how I have gotten used to making my bread.
Day 1 – morning (anywhere between 8:00 – 10:00)
I take my sourdough starter out of the fridge and feed it. I then leave it out on the counter to do it’s job. Sometimes I will put it on our radiator to increase the heat and make it work faster.
Day 1 – afternoon (anywhere between 14:00 – 16:00)
I mix the flour and water from the recipe (step 1 in the recipe below). The specific time when I do this depends on two things. I have to be ready to get started (meaning we don’t have any other activities happening in our out of the house). The starter needs to be ready to get started (see the chapter on starter for more details). So this is really quite flexible and can be moved to later if there is something else I need to do first.
Day 1 – afternoon
Following the timings in my recipe I add the starter, salt and cumin to my flour mixture (steps 2 and 3 below)
Day 1 – late afternoon
Throughout the late afternoon I do the folds roughly 20 – 30 mins apart (step 4). Usually I do 4 rounds of the folds but like everything else this is not an exact science, sometimes I will do more sometimes less. This depends on what else is happening (eg. I am going outside for a bit and so I just skip one round or I simply forget about it). But mostly it depends on how the dough is doing. If I start seeing lots of large bubbles appearing on the surface of the bread I know it’s time for the proofing step regardless of how many folds I have done.
Day 1 – evening
I shape the bread, put it in the proofing basket, cover it up and it goes into the fridge (step 5 and 6)
Day 2 – any time really
I bake the bread (steps 7 – 9). The time when I do this depends on what my plans are with the finished bread. If we want to eat it in the afternoon or with dinner then I bake it in the morning so that it has enough time to completely cool down. If I won’t need it until the day after then I will bake it whenever I have time for it.

Ingredients
- 360 g all purpose flour
- 240 ml water
- 160 g active sourdough starter
- 9 g salt
- 4 g cumin
Instructions
- In a bowl mix the flour and water and let it rest covered for 30 mins.
- Add the active starter, mix it well and let it rest covered for 10 mins.
- Add the salt and cumin, mix it well and form it into a boule in the bowl. Let it rest covered for 30 mins.
- Do the first fold and cover again and let it rest for another 30 mins. Repeat 3 more times (in total you have done 4 folds) with a final rest for 20 mins.
- Flour your bread proofing basket and your countertop. Then shape the bread on the counter and put it in your basket. Cover it up (I use a plastic bag).
- You can let the bread rise for about 2 hours on your counter and then bake. If you prefer to do a longer fermentation place your bread in the fridge for about 24 hours.
- Preheat your over to 250 °C with your dutch oven inside. Once it's preheated let it run for about 30-60 mins before inserting the bread. Bake the bread for 20 mins with the lid on.
- Decrease temperature to 200 °C and bake for another 10 mins (longer if you like a darker crust) with the lid off.
- Let it cool until it reaches room temperature (even the bottom of the bread). Only then slice into it. Enjoy!